Where to Contour and Highlight on Your Face — Quick and Easy Makeup Tutorial!
Life & Style’s How To: Beauty Buzz will cover the latest in makeup trends while answering all of your beauty related questions — step by step! Stop by each week for the latest update!
In our past makeup tutorials, we’ve shown you how to apply your highlighter like a queen. But what good is highlighting without a fully-realized understanding of the power of contour?
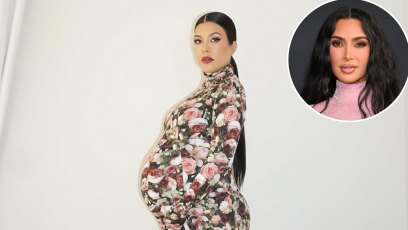
First, a brief history lesson. Contouring has been around for centuries, dating as far back as the early 1500s when the extremely chiseled look was used for stage makeup. More recently, drag queens have been relying on the magic of contouring to reshape their faces for decades.Then “contour” became a household name, a tool in the makeup kit of all beauty bloggers, vloggers, and Instagram users once Kim Kardashian West uploaded a before-and-after photo of her transformation, popularizing the professional technique.
Nowadays, Kim K. isn’t the only one who can master the art of contouring. It’s a completely accessible makeup trend! All you need is foundation your color, foundation a few shades darker, and concealer that’s a few shades lighter. Armed with these three tools in your makeup caddy, you’ll find the process of contouring your face easier than you’d ever imagined.
Still not a master of contouring? Keep reading this edition of Life & Style’s How To: Beauty Buzz for a step-by-step tutorial.
What You Need
Foundation (should match your skin tone)
Foundation (1-2 shades darker than your skin tone)
Concealer (1-2 shades lighter than your skin tone)
Bronzer
Tapered brush
Fluffy brush
Translucent powder
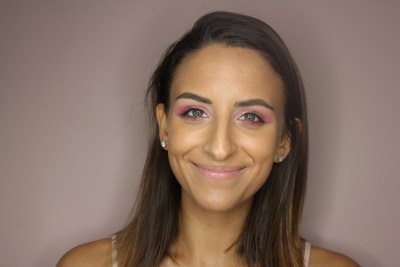
Before shot with light foundation on, eyebrows, and eye makeup done.
Step 1: Map your face with concealer
Yep — we’re doing this Kim Kardashian face-mapping style. Start with a base of foundation, then use the concealer (which as stated above, should be a few shades lighter than your actual skin tone) to map out the lighter areas of your face.
These areas include under your eyes, down the middle of the nose, the middle of the t-zone, and your chin. The best way to disperse the product under your eyes and at the t-zone is to draw upside down triangles with the concealer, as seen in the picture below.

Step 2: Map darker areas with foundation
Just as we did in Step 1, we’re going to map out the contoured, more chiseled-looking areas with the darker shade of foundation. I used Maybelline’s Fit Me Foundation Stick in the shade toffee, which is under $10 at Target. It’s malleable and crayon-like, which makes it easy to draw the contour lines with.
Use the darker shade of foundation to line the jaw line, under the chin, under the cheekbone, the sides and tip of your nose, and the all around the hairline atop your forehead. When mapping out the contour of the cheeks, I liked to draw inverted triangles, the points of which aim toward the chin. This is very important: None of the lines should criss-cross or touch.

Step 3: Blend out the concealer
Use a beauty blender to thoroughly blend out the concealer first. Take care to make sure that none of the concealer and darker foundation meet. When blending the under eye concealer, it should not be blended upward (toward the forehead) but outward, toward the hairline. The concealer should not be blended higher than the eye, or it will ruin the illusion of the contour.

Step 4: Blend out contour
Many people rely on beauty blenders to blend out the contour if it’s cream but I personally prefer to use a tapered brush for this step. Again, while blending out the contour, be careful to not cross the lines you already mapped out. The darker foundation should be blinded with a light hand in a back-and-forth motion. Take care not to criss-cross the lines, otherwise the darker lines will head into highlighter territory, ruining the effect.
Once it’s all blended out, it should look similar to the photo below.

Step 5: Add highlight to cheekbones
I used the shade “Pink Heart” from the Anastasia Moonchild Glow Kit as my highlighter. Gently apply the illuminator to the top of the cheekbones, the tip of the nose, the cupid’s bow, and the chin using a fluffy brush.
In between the highlighter and the first bit of darker contour, there should be an open space, directly on the cheekbones. This is where your blush goes! I used Laura Geller’s Baked Blush in the color Honeysuckle.
The last thing I jam-packed into this step (though not pictured) is using a fluffy brush to go over the contour lines with a bit of bronzer. You definitely don’t want to overdo it and make the lines too taut, too noticeable, but bronzer can help define the contour more intensely, while giving you a sun-kissed glow.

Step 6: Set with translucent powder
To ensure your contour (and the rest of your makeup) has staying power, your final step is to set everything with a translucent powder. Use a big fluffy brush, a small amount of translucent powder, and pat it onto the face carefully.

To finish off the look, I applied Anastasia’s Matte Lipstick in Cotton Candy, available at Sephora. For more tips on applying highlighter, check out our illuminator tutorial.


